


June - Episode 1

Welcome to the first of my offerings for June. (The next batch will be posted on the 21st.)
So what’s coming up this time?
We have:
· my Pollinator Plant of the Month – the Rose
· we’re taking a look at how to take cuttings
· some jobs to be getting on with
· nature notes – what butterflies and moths you might come across this month
So without further ado, here’s my Pollinator Plant of the Month
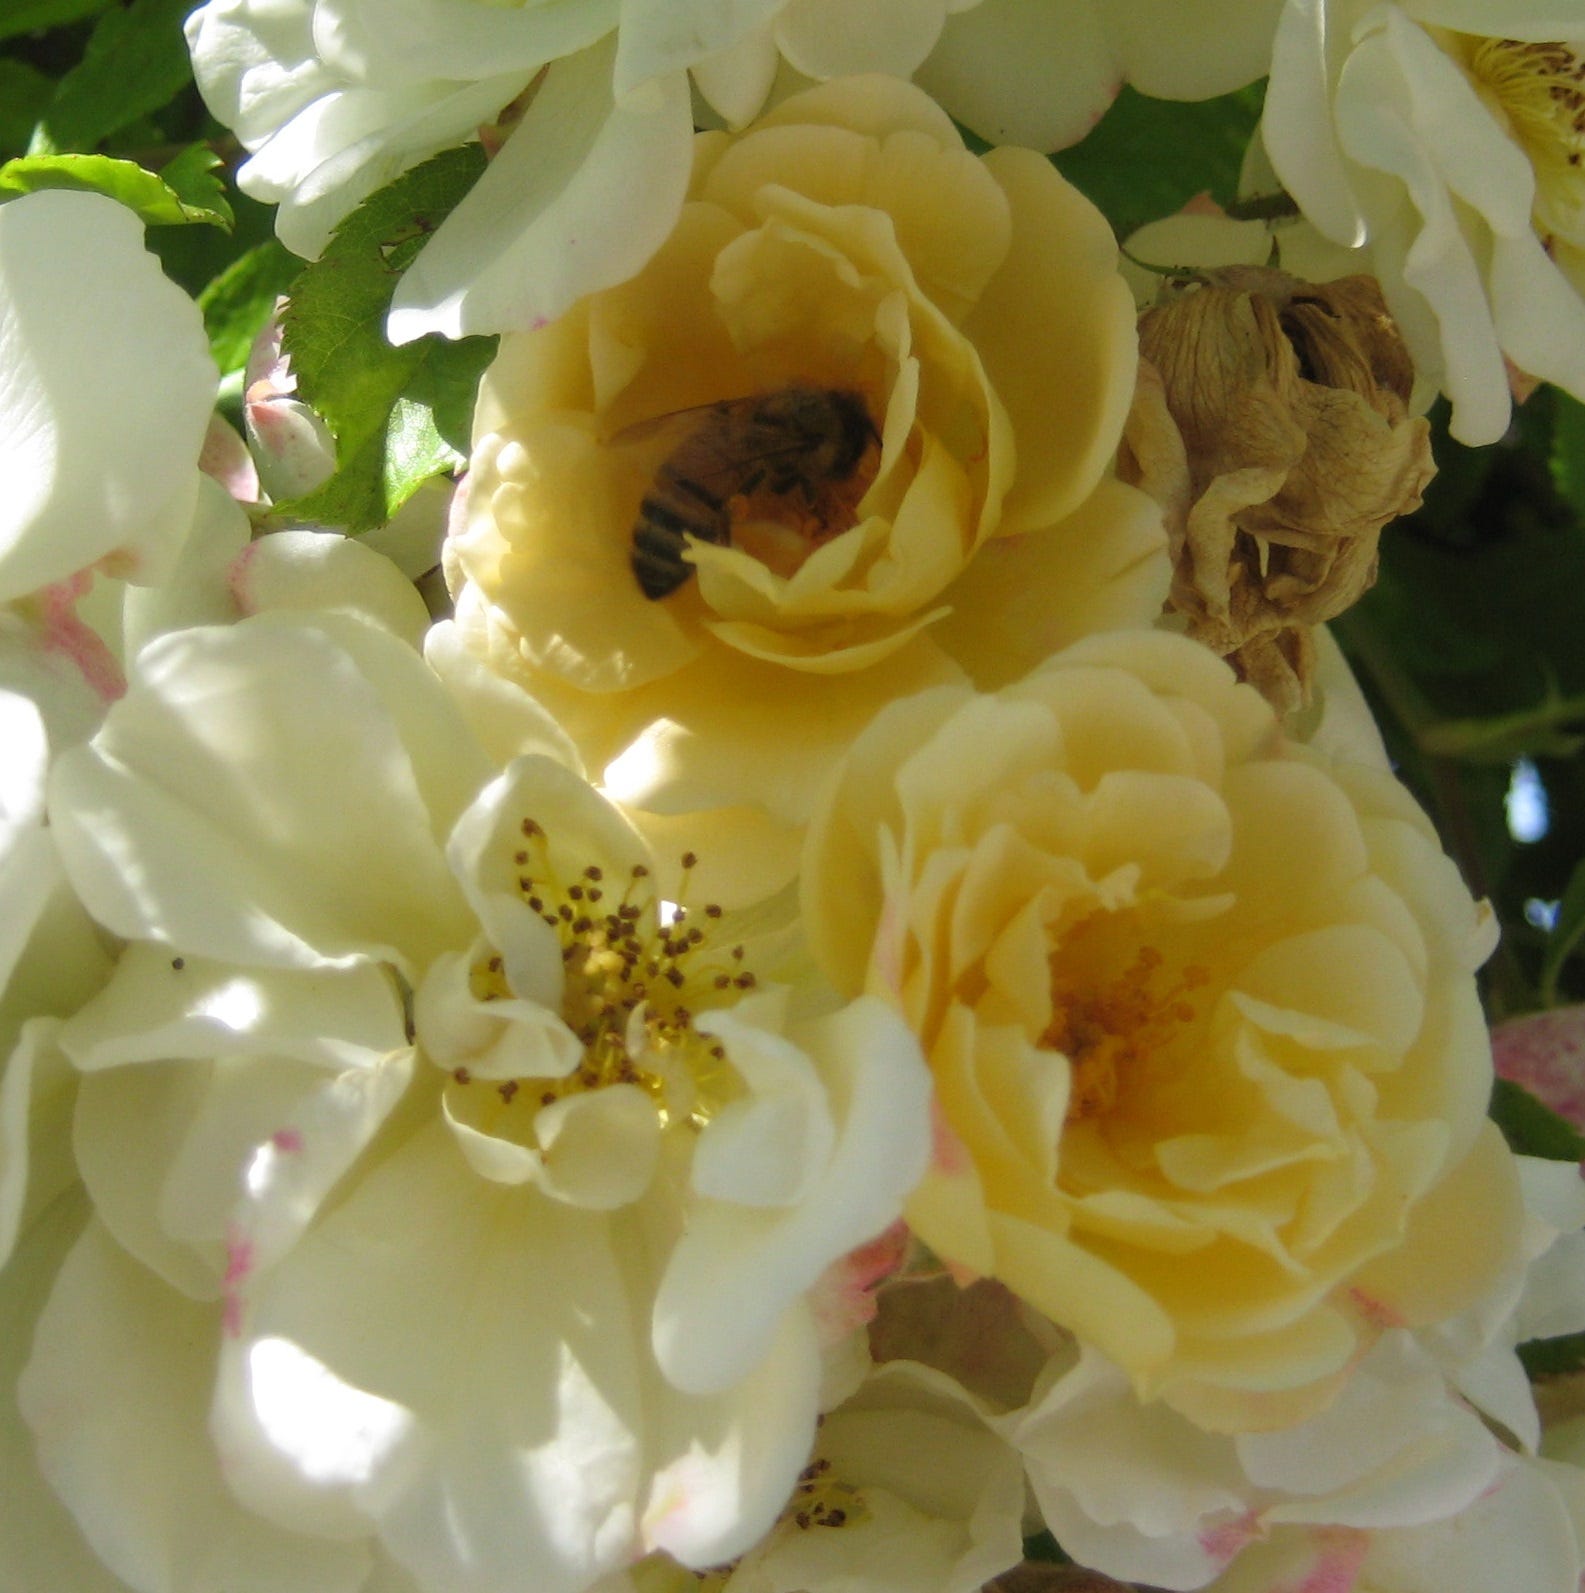
Beauty and the Bees
We’re getting ever closer to rose season. Gertrude Stein (the early twentieth-century novelist and poet) famously wrote in a non-horticultural context: ‘A rose, is a rose, is a rose.’ But, horticulturally speaking, roses are not all the same. There are the big, blousy, old-fashioned blossoms; simple, single-flowered species; prim, hybrid teas; multi-bloomed floribundas; repeat-flowering, English roses. All are undoubtedly beautiful, but not all are of use to bees.
So what roses are useful to bees? Putting it simply, any rose that produces a hip (the seed pod) must have had a fertile flower bearing pollen which has itself been pollinated to produce the hip.

This prerequisite cuts out a large number of varieties, particularly those with double flowers because they are almost certainly sterile, with little or no pollen. Pollen is vital not only in order for the plant to reproduce, but also because it is one of only two foodstuffs which bees need to survive – the other being nectar. So think like a bee when choosing a rose – if you can see the centre of the flower where the business of pollination takes place, then so will the bee!
I have come across a number of bee-friendly roses over the years including the fragrant, milk-white, Rosa alba semi-plena. Some people are often dismissive of the Latin name, but this is a really good of example of how the Latin gives us a clue about the plant itself: Rosa simply means it’s a rose; alba means it’s white; and semi-plena tells us it’s ‘half-full’ or semi-double. Introduced in the 16th Century, it was adopted as the symbol of the House of York and it’s graced our gardens ever since. It grows to about 2.4m in height with a spread of about 1.5m so it needs a fair bit of room.
I also like very simple, delicate pink rugosa rose ‘Fru Dagmar Hastrup’. Not only is her flower modest, her size is too, growing to about 90cm in height with a spread of about 1.2m. She’s a repeat flowerer so you and the bees can enjoy her all summer long.
If you’re looking for a bee-friendly semi-double pink rose, then you can’t do much better than R. ‘Sarah van Fleet’. She is fragrant, doesn’t grow too big (1.2m in height with a spread of about 90cm) and she flowers all summer – what more could you ask for?
Now, if you fancy something a bit more strident there is Rosa moyesii ‘Geranium’ with its single red blossoms. Although red is not the most attractive of colours to bees, all is not lost because what they zoom in on is the centre of the flower which displays creamy-coloured anthers. You’ll need a bit of space for this species rose, however; she can grow to about 2.5m with a spread of 1.5m. A rose that I find people either love or loathe is Rosa gallica ‘Versicolor’, otherwise known as Rosa mundi. I love it because bees do. This shrub rose, introduced about 1200, has a single flush of pale pink striped with darker pink flowers with bright yellow at the centre. It will tuck nicely into a border, being only 90cm in height with a spread of 90cm.
A more current example of a ‘striped’ rose is ‘The King’s Rose’, introduced at Chelsea this year by David Austin Roses. It’s a beauty – and, being semi-double it will be a hit with bees too.
We’ve had the white rose of York so we shouldn’t forget Lancashire’s very own rose, the red rose of Lancaster, Rosa officinalis var. gallica. (Below) Don’t expect to see the vibrant red flower depicted in stylised emblems of the rose, though; the semi-double blooms are more of a pinkish-crimson which contrasts beautifully with the greyish-green foliage. Also known as the Apothecary’s Rose it’s been grown in Britain for centuries, finding a place in herb and healing gardens: with a height of 90cm and a spread of 90cm it’s easy to accommodate.

Further round the colour wheel we find R. xanthina ‘Canary Bird’, a shrub rose with single, bright yellow flowers and beautiful fern-like leaves. It’s one of the earliest roses to bloom which is an added bonus for bees.
My all-time favourite ‘bee rose’, however, is the semi-double, compact (2.4m x 1.5m) rambling rose R. ‘Goldfinch’. It has clusters of small flowers which are a muted egg-yolk yellow when they open, gradually fading to clotted cream and then to white just before the flowers shatter. Although it only flowers once (like most ramblers), it does so for three to four weeks when the whole plant is festooned with hundreds of fruit-scented blooms studded with golden pollen-bearing anthers which our buzzy friends adore.
So, if you are thinking about adding a rose or two to your garden, spare a thought for our hard-working pollinating insects – you can have beauty and the bees!
Next, let’s have a look at …
How to take Cuttings
I am an inveterate cutting-taker. I don’t mean that I go around other people’s gardens pinching off - and pinching - suitable material to use for cuttings; certainly not. But I do take lots of cuttings from my own garden, and the gardens of generous friends, to grow on and give to friends or to donate to charitable events. There is nothing more satisfying than being able to share some of your best-loved specimens with others, and taking cuttings is one of the easiest ways of doing this.
A word of warning, however – make sure that the plants you are taking cuttings from are not governed by Plant Breeders Rights (PBR). This means that the breeder of the particular plant has a form of intellectual property rights over it, preventing anyone from benefiting from propagating it, selling it, and so on, without the breeder’s authority.
If you do take cuttings, don’t expect all of them to ‘take’, namely, to produce new roots and shoots. Some will inevitably die before they have a chance to live, as it were, so don’t be disappointed if you do lose a good number. As a general rule of thumb, I always take twice the number of cuttings as the number of plants I would like to end up with - I usually end up with a better success rate than that, but I like to be on the safe side.
There are a number of types of cuttings: softwood, basal, semi-ripe, hardwood and root. They are taken at different times of the year
Softwood Cuttings
In spring you can take softwood cuttings from shrubs. Material is taken from the soft and flexible young shoot tips, which root readily at this time of year. The best time of day to do this is in the morning when the plant is turgid, or full of water. Before you start taking cuttings, make sure you have a clean, sharp knife and have ready some clean, 9 cm pots filled with compost. The number of pots depends on how many cuttings you wish to take: you can fit four or five in a pot. Select a non-flowering shoot and cut it just above where the leaves join the stem - the node. You need a shoot about 10cm long. Pop the shoots into a plastic bag until you are ready to prepare them for planting: this will prevent them from wilting. When you are ready to plant them, take them out of the plastic bag and, with a sharp knife, cut the bottom of the shoot off to just below a node. Carefully remove the lower leaves and pinch out the top of the shoot. It’s at this point when you can dip the shoot into a hormone rooting gel, liquid or powder which contains plant hormones and usually a fungicide which, respectively, causes stem cells to grow and develop, and reduces the chance of fungal infection. (I say arguably, because I didn’t seem to have any better results when I used a rooting gel than when I didn’t - have a go yourself and see what happens.)


Then make a hole in the pot of compost near to the edge - you can use a dibber, but I use a pencil which seems to do just as good a job – pop the cutting in so that the first set of leaves is above the surface of the compost and push the compost back around the cutting. Water the pot from above so that the compost settles around the cutting.
If you have a heated propagator this is ideal, but I pop each pot into a large plastic freezer bag and use the thin paper-coated wire tie to loosely pull the opening together at the top. I don’t tie it tightly, but leave a small gap so that a certain amount of air can still circulate. The whole thing then goes on the window sill, and because the pot is inside the bag, you don’t need to worry about standing the pot on a saucer. Don’t put the pot in direct sunlight, though, as this will scorch the leaves. Open up the bag periodically to aid ventilation and remove any dead or decaying material as you see it. Keep the compost moist. The cuttings should develop roots in about ten weeks and, once they are well rooted you can pot them on into their own individual pots. As long as you can do this by mid-summer they will develop enough roots to carry them through the winter, otherwise leave them and pot them up next spring.
If you want to take cuttings from tender or borderline tender perennials, such as Penstemon and Verbena rigida follow the same procedure for taking softwood cuttings, but make sure you keep them undercover in a light, frost-free environment at all stages, until next year when they can be planted out in the garden when there is no danger of frost.
Basal Cuttings
A similar method to taking soft wood cuttings is used to take cuttings from some perennials. The only difference is that the cuttings are taken from the base of the plant where the young shoots start to grow in spring: these are called basal cuttings. Take the shoots from as close to the base as possible and then treat them just as you would soft wood cuttings.
Semi-ripe Cuttings
Late summer into autumn is the time to take semi-ripe cuttings. These are cuttings from the current season’s growth where the base of the cutting is hard while the tip is still soft. The method for taking semi-ripe cuttings is just the same as for soft wood cuttings, above.
Hardwood Cuttings
It is important to remember to take hardwood cuttings during the dormant season, when the plant is not growing. The ideal time is just after the leaves have fallen in the autumn or during late winter to early spring just before the new buds start to burst. To take hardwood cuttings you should choose a shoot that has grown in the current year. If you select a long enough one, you may be able to get more than one cutting from it. Remove the soft growth at the tip and cut the rest into sections 15-30cm long, depending on how many dormant buds there are. (Both roots and shoots will break from the dormant buds so the more buds there are, the shorter the cutting can be.) You should make a sloping cut, just above a bud at the top and a straight cut just below a bud at the base – this way you know which way up you should plant the cutting. You can plant them into a trench outdoors but I always put mine into pots filled with a mixture of 50% horticultural grit and 50% multi-purpose compost. Water them in and leave them in a sheltered position in the garden (a cold frame is ideal but not a necessity). Don’t worry if nothing appears to be happening for some time after you have planted your cuttings; it usually takes a while for them to develop roots and shoots and it may be well into the new growing season before anything starts to occur.
Root Cuttings
You can take root cuttings from mid-autumn to early winter. Firstly, fill a seed tray with gritty compost, press it down slightly and water it. Then carefully dig up the parent plant, keeping intact as much root as possible. With a sharp knife cut off vigorous roots as close to the crown as you can, but do not remove more than a third of the root system from the parent plant otherwise it will struggle when you replant it. Cut each root into 3-10cm lengths (the thinner the root, the longer the cutting should be), place them on the surface of a prepared tray about 4cm apart, and cover them with a thin layer of compost. Put them in a sheltered position - again a cold frame is ideal - and in the following spring, when there are signs of growth and the cuttings are well rooted, pot them up individually to grow on.
A friend of mine has adopted another way of taking root cuttings which has proved as successful as any other she has tried. She prepares the cuttings in the usual way, but rather than putting them in seed trays, she simply puts them in a plastic bag with several handfuls of only-just-damp compost. She then gathers the top of the bag together, blows in it so that it is full of air, and then seals it with a wire tie. Then she just leaves it in a cool place until she sees shoots and roots appearing, and then pots up the little plantlets. Easy - and, she maintains, foolproof!
And there we have it - how to take cuttings.
Here are some
Jobs for June
Continue weeding - remember the old adage: one year's seed is seven years of weeds!
Finish pruning spring-flowering shrubs.
Fill in gaps in the borders with new plants.
Watch out for suckers on roses. Most roses are grafted onto rootstock and every so often the rootstock will throw out a shoot - a sucker. It’s easy to identify because it will grow from below the graft. Remove it, otherwise the plant’s energy will be diverted into the sucker rather than the grafted rose and soon the rootstock rose will take over.
Keep watering any plants in containers, including seedlings. And remember - water the soil, not the plant!
Support any tall-growing perennials before they start to flop over.
Nature Notes
looks at Butterflies and Moths that you might come across this month.
If you’re out and about in the garden or the countryside, here are a few that you might find:
Brimstone, Elephant Hawkmoth, Marbled White, Orange-tip, Painted Lady (below left), Peacock (below centre), Scarlet Tiger, Small Tortoiseshell (below right).


For lots more information about butterfly- and moth-friendly gardening in June check out Butterfly Conservation’s page: https://tinyurl.com/332t3m7k
Pictures credits: All my own: © Maureen Little except - Rosehips: Pixabay, Painted Lady Butterfly: © Kirsten Platt.