


Cow fodder, bitter oranges and a magpie!
All of these, and more, feature in this set of articles from Maureen at The Bee Garden

It’s the 3rd Saturday of the month – time for the next set of articles from Maureen at The Bee Garden.
So what’s coming up this time? Articles include:
‘Cow fodder’!
Seville oranges – and a recipe
some more jobs to be getting on with in January
my thoughts on a work of art
latest news
For more information about The Bee Garden and what I get up to, have a look at my website www.thebeegarden.co.uk which also features my online shop. And as a thank you for signing up to receive these articles, you can get a 10% discount on all items in the shop: simply enter SUB10 at the checkout and the discount is automatically activated.
So without further ado, let’s get going!
COW FODDER!
“Humph. Cow fodder. Didn’t realise things were that tight.” These were the words my dear, old, and often cantankerous, dad uttered when I presented him with Cavolo Nero along with his favourite roast beef, roast spuds, parsnips and lashings of gravy several years back. Despite his initial negativity, and several more humphs, he tucked into it as soon as he realised there were no ‘proper’ greens to be had. I’ve learned to love kale, but my dad, like many other countryfolk of his generation, deemed it only fit for animals. Now it has become almost fashionable, especially in its quirkier forms, like ‘Redbor’ and ‘Emerald Ice’, and the one we are focussing on, Cavolo Nero.
Cavolo Nero is also called black cabbage or Tuscan kale, and you may find it listed under Cavolo Laciniato or Nero di Toscana. As you can tell from its name, this kale originates in Italy where it has been grown since the nineteenth century. It has found its way to the UK, however, and due to its hardiness it can be grown just about anywhere.
Cavolo Nero does have a bit of a quirky appearance. I once heard it described as a savoy cabbage that’s been on a diet and is having a bad hair day. True, the leaves have a puckered, almost blistered look, like that of savoy cabbage, but they are much narrower; and because they grow in layers from a central stem the leaves can look a little dishevelled rather than neatly coiffured. Having said all that, I think the plants look very decorative in the veg patch, or indeed in the perennial flower border, especially in winter when the frost has bitten.


Growing Cavolo Nero is much the same as growing any other member of the brassica, or cabbage, family. You can sow seeds outside in June or July in a shallow, pre-watered drill in soil with a fine tilth - the delicate roots of the new seedlings will be far happier without great clods of earth to negotiate. Also make sure you sow them thinly and at the correct depth (about a centimetre). Don’t be in too much of a hurry to get started – wait until the soil is warm enough otherwise the seeds will sit and sulk, and may even rot before they have had time to germinate. Give them a sunny spot, although they can cope with a little shade.
When it comes to soil, all the members of the brassica family will thank you for being planted in a good, fertile, slightly alkaline soil. Club root, the scourge of the brassica family, is a fungal root infection which thrives in acid soil, so applying lime will reduce the chances of getting it, although it won’t eliminate it.
Brassicas are hungry feeders so if you practice crop rotation, plant them in the bed which has had legumes growing in it previously – the nodules on the roots of peas, beans and the like fix nitrogen in the soil which will profit the brassicas to follow. The bed will also benefit from a good dose of well-rotted manure. Beware, though; don’t spread lime and fertiliser at the same time – they will react with one another and cancel out any benefits.
Although Cavolo Nero is a pretty tough customer, and can withstand most onslaughts, there is one pest which will strip your kale and other brassicas during the winter months when other vegetation may be difficult to locate – pesky pigeons. A block of greenstuff in your veg patch will be irresistible to them. Herby, my now deceased border terrier, used to do his best to scare them away, although most of the time they would just sit on the fence blowing pigeon-y raspberries at him.
You will be able to start harvesting leaves from November and, all being well, you will still have some welcome fresh veg in April. Start picking the young leaves from the bottom of the plant to encourage more growth at the top.
The term ‘super food’ is bandied around a little too often these days, I think (all good food is super as far as I’m concerned!) but Cavolo Nero, along with other members of the kale clan, is jam packed with vitamins and minerals. You can find vitamins K, A, C, E and the Bs, as well as manganese, copper, calcium and iron. It’s also a really good source of lutein, an antioxidant. So mum really does know best when she says eat your greens!
Please don’t just boil it up and plonk it on a plate like the school dinner-ladies of my childhood did with the cabbage, after the sulphurous aroma had wafted through the corridors since half past nine in the morning: Cavolo Nero deserves more attention than this. My favourite method is to remove the central stem, finely slice the leafy bit and then stir-fry it, finally dressing it with a little olive oil and a touch of balsamic vinegar. The central stem can be diced and added to a casserole.
Cavolo Nero is also a mainstay of the classic Italian soup-like dish ribollita. Meaning ‘twice cooked’ this concoction of veg and beans should be made one day and reheated the next, by which time all the flavours will have mingled and intensified. It’s gutsy, filling, and cheap food, ideal for when you’ve been working in the garden on a cold but sunny winter day and have worked up an appetite for a warming lunch.
SEVILLE ORANGES
It’s Seville orange season. The time when marmalade aficionados – and non-aficionados, like me – look to making a fresh batch for their breakfast toast. It’s a short season encompassing just January and February, so make the most of this quintessential seasonal fruit.

The Seville orange (Citrus × aurantium) – aka bitter orange, sour orange, or bigarde orange – probably originated as a natural cross between the pomelo (Citrus maxima) and the mandarin orange (Citrus reticulata) in Southeast Asia.
So how come we call it Seville orange after the Spanish city? It’s all down to the Moors, followers of Islam, who introduced it to Spain in the 10th Century. Trade enabled the exotic citrus to take root in the Middle East and parts of Europe where the climate is clement enough.
Sour oranges made their way to the UK from Spain in the 1500s, but it is not until 1677 that we have a written recipe for 'marmelat of oranges' by Eliza Cholmondeley. However, it probably didn’t resemble the marmalade we have today; it was more likely to be a paste, or ‘cheese’, much like the original Portuguese marmelada, made from quince. (Marmelo is the Portuguese for quince, hence the name.)
Marmalade as we know it is really just a jam made from citrus fruits, so how is it made?
Making MARMALADE
There are basically two ways of making marmalade: the whole fruit method; and the sliced fruit method.
The amount of lemon juice and granulated sugar is the same for any fruit: for 1 kg of fruit you need 75ml of lemon juice, and 2kg sugar. This amount will make 12 x 200g jars.
You can, of course, make a traditional Seville orange marmalade, but you could use any other citrus fruit at other times of the year. Why not try lemon and lime; pink and yellow grapefruit; or three-fruit marmalade, using grapefruit, lemon, and sweet orange?
And you can add other flavourings too. The winner of last year’s Dalemain Marmalade Festival was an orange, lime and chilli marmalade! (More about the Festival below.)
Loving anything to do with bees, I often substitute some of the sugar with honey. So instead of 2kg of sugar I use 1.75kg of sugar and 250g honey. A point to remember is that honey has a lower burn point than sugar so, keep an eye on it when it gets near to the setting temperature.
Whole fruit method
This method will give a darker, cloudier result because you cook the fruits whole before cutting them into slices. First of all you need to scrub the fruit to remove any wax or residue, then remove the hard ‘star’ from the top. Put the whole fruit into a pan with 2.5 litres of water and bring to the boil. Simmer for about 2 hours or until the skins of the fruit can be easily pierced with a fork.
When the fruit has cooled a little, remove it from the liquid, cut each fruit in half and take out the pips. Then cut the fruit into thick, medium or thin shreds, depending on your preference, and put the whole lot back into the liquid in which it was cooked.
Add the lemon juice and sugar and heat gently until the sugar has dissolved. Then boil rapidly for about 5 minutes and test for setting point using a thermometer. Take the pan off the heat and leave for about 10 minutes, gently stir in any scum, then pour into sterilized jars and seal.
Sliced fruit method
This method will give you a clearer marmalade. Again, you need to scrub the fruit to remove any wax or residue, then remove the hard ‘star’ from the top. Cut each fruit in half and squeeze out the juice into a large bowl. Set aside the juice and slice the peel and pith into thick, medium or thin shreds. Put the sliced peel into the bowl with the juice and add 2.5 litres of water. Cover the bowl with a cloth cling wrap and leave the mixture to infuse overnight.
Next day, pour the mixture into a preserving pan, bring to the boil and simmer for about 2 hours or until the peel is tender. Add the lemon juice and sugar and heat gently until the sugar has dissolved. Then boil rapidly for about 5 minutes and test for setting point, using a thermometer. Take the pan off the heat and leave for about 10 minutes, gently stir in any scum, then pour into sterilized jars and seal.
Marmalade Festival
If you feel confident enough with your effort, why not enter your marmalade in the prestigious Dalemain World Marmalade Awards? It raises money for charity and attracts entries from all over the world. The overall winner’s marmalade is sold at Fortnum and Mason – quite a coup.
Entries are now open so what are you waiting for!
Go to www.dalemain.com/competition-entry for lots more information about the event itself, the various categories, and the entry forms. The Competition closes on 3rd February, so get those maslin pans out and start creating!
(By the way, I entered a few years ago and actually got a bronze certificate – the trouble is I can’t find it and no-one will believe me now!)
Following on from my first post earlier in the month, let’s look at some more gardening JOBS FOR JANUARY.
Pots of snowdrops can be found in nurseries and garden centres any time now. Buy them in flower then you know what you’re getting.
If you have any mistletoe left from the Christmas festivities and you haven’t used up all the berries when you claimed a kiss, you can press any leftover berries in the bark of apple trees to start your own crop of mistletoe. It may take a while though!
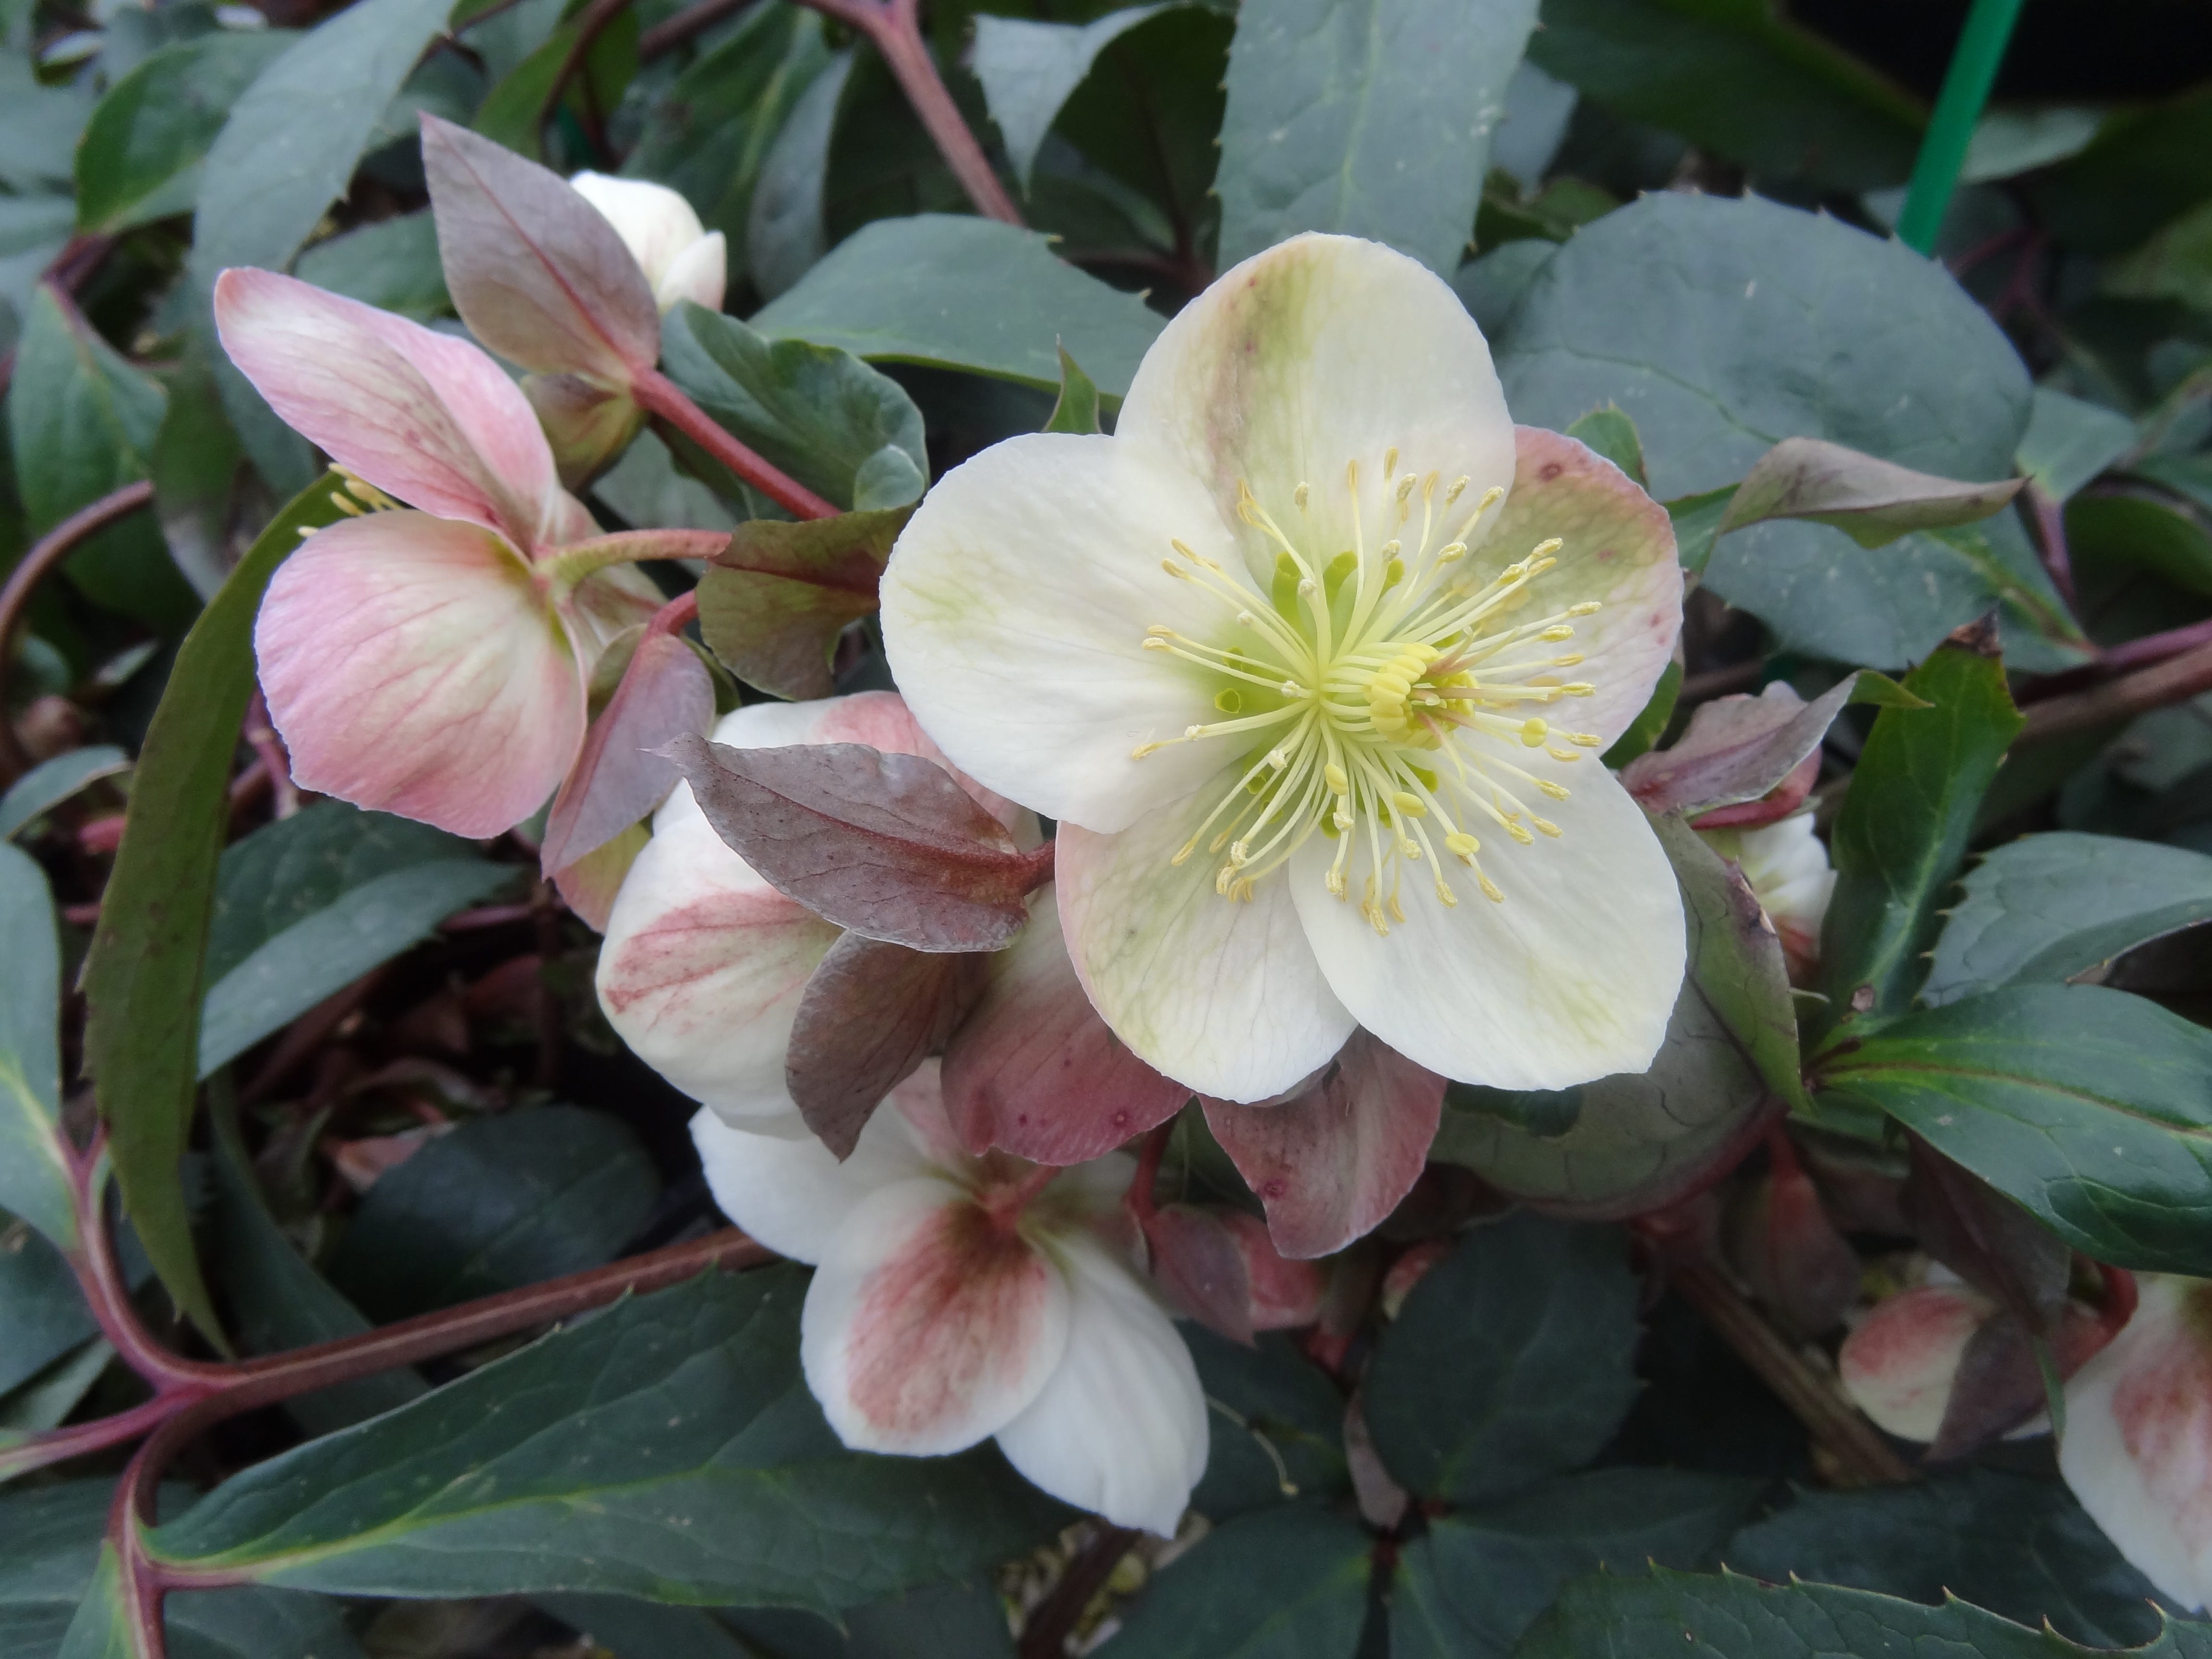
Tidy up hellebores by removing old leaves so you can see the flowers better. This also helps prevent disease.
Although you may have used your secateurs for pruning, make sure these and other bladed tools are clean and sharp ready for the coming year. Remove any debris or dirt, sharpen them, and then wipe with an oily cloth to prevent rust. Keeping tools clean also helps prevent the transfer of disease.
Winter pansies are persistent, flowering all winter long, especially if you deadhead them. This will encourage even more smiley-faced flowers to add a touch of joy during the dark days.
Another job that can be done during the dormant season is taking hardwood cuttings from deciduous shrubs like Forsythia, Philadelphus, Cornus and shrub roses.
It’s a good idea to check on any dahlias that you have lifted and stored. Remove any that have signs of disease or rot.
HERE’S THE BIT ABOUT THE MAGPIE!
We’re into January: the tree and decorations have been taken down, as have the Christmas cards. I wonder how many people actually still send cards? We’ve certainly had fewer this Christmas. I have a funny feeling this isn’t entirely down to friends not wanting to send them, but it’s more to do with the cost of postage which is crippling. In addition, many more people now contribute an equivalent amount of the cost of the card and postage to a charity.
We did get some, however, and one of my favourites has nothing to do with the birth of Christ, which after all is what Christmas is about. No, this one features a magpie sitting on a gate in a very snowy landscape. It’s a reproduction of a painting by Claude Monet, entitled La Pie (The Magpie).
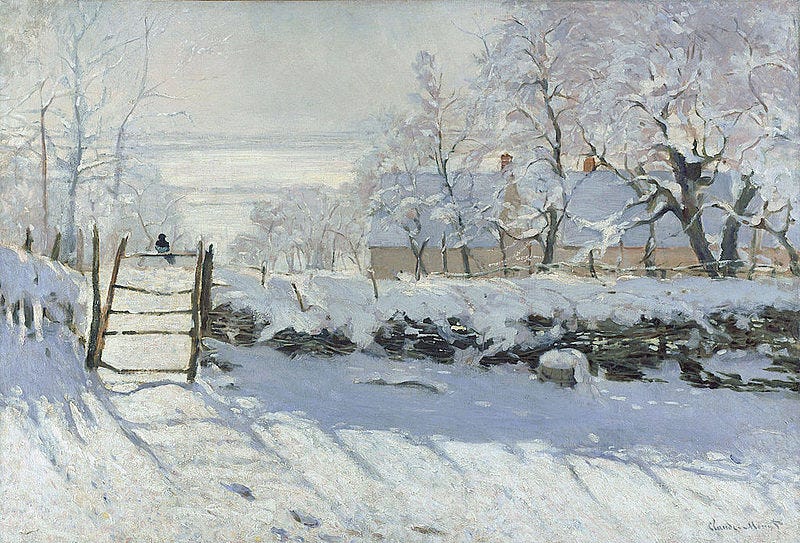
Why call the painting The Magpie? Surely Landscape in the Snow would be more fitting? No. Take away the magpie and there is no focal point. Knowing the title, our eye seeks out the bird and rests there, just like the magpie itself – waiting, watchful.
It’s a tour de force of what Monet is quoted as wanting to achieve with his art: “I would like to paint the way a bird sings.” I doubt that the magpie in the picture is singing, but nonetheless, some commentators have given it a musical quality, pointing out that the gate that the bird is sitting on is like a musical staff, with the magpie denoting an ‘F’ in treble clef or an ‘A’ note in bass clef. I’ll leave that open to discussion.
Also open to discussion is something fanciful that my mind’s eye conjured up: I wonder if there might be some beehives the other side of the fence, in a sheltered spot away from the worst of the weather? Perhaps not!
What is certain, however, is that Monet has achieved what would appear to be almost impossible to attain – he catches the luminous quality of light on snow and the equally elusive muted quality of shadow, with shades of white and cream, infused with blue, grey, purple and even pink. The fence, trees, and house are picked out in subdued colours and yet there is nothing lacklustre about this painting – it is alive with lustre and radiance, just like the spirit of the winter season.
NEWS
We’re always talking about the weather – too hot, too cold, too stormy, too rainy…. But 2024 saw weather that had a seriously negative effect on many insects, including bees and butterflies. The mild, wet year distorted the seasons and affected the flowering times of many plants, which in turn saw irregularities in numbers of insects which feed on the flowers.
Butterfly numbers were much lower than usual. Results of the 2024 ‘Big Butterfly Count’ arranged by Butterfly Conservation reveal lowest numbers on record:
“Overall, participants spotted just seven butterflies on average per 15-minute Count, a reduction of almost 50% on last year’s average of 12, and the lowest in the 14-year history of the Big Butterfly Count.”
Let’s hope that this is not repeated in 2025 – but with climate change a reality, I fear that seasonal patterns may be disrupted routinely in the future.

Campaigners are pushing for the Government to fully ban neonicotinoid pesticides which have been proven to be harmful to bees and other pollinators. As reported in the I Newspaper on 21st December, despite being banned in the UK in 2018, they have been authorised for emergency use in England every year since 2021. The Government is now setting out plans to end the use of neonicotinoids, but applications for emergency use can still be lodged for 2025. As quoted in the I Newspaper, Doug Parr, Greenpeace UK’s policy director said: “The ridiculous doom-loop of annual ‘emergency’ authorisations of these toxic chemicals must be broken, and farmers must be supported.”
If you want to add your name to a petition to enforce a total ban on bee-killing pesticides go to https://action.greenpeace.org.uk/ban-bee-killing-pesticides
And if you want to read the full debate about ‘Neonicotinoids and other Pesticides’ which took place in Parliament on 5th March 2024 go to https://tinyurl.com/2wy3n72r

Photo and picture credits:
Magpie by Monet: Image taken from Wikimedia Commons, the free media repository
First Cavolo Nero pic, Seville oranges: Pixabay
All others: my own